
The amount of times I’ve made macarons and failed is too many to count. Every time they wouldn’t turn out, I would call my husband at work and tell him I’m never trying again. Then half an hour later I would call him back and ask him to pick me up more ground almonds and powdered sugar on his way home from work. I swore I wouldn’t let a cookie beat me.
I tried several different recipes that I found, all with varying degrees of failure.
Then I found Bravetart (www.bravetart.com) and this changed my life as far as macarons are concerned.
I’ve modified my recipe slightly to work for me, and everyone will have to do some tweaking to get this to work for them, it’s definitely not a cut and dry type of recipe. It will take time to get used to the technique and there will be cookies that don’t turn out, but remember they still taste good, so eat them.
Start off by weighing out and then sifting together your ground almonds, powdered sugar and cocoa powder. (I get my ground almonds in a 100 gram bag so I don’t have to weigh them out.)


Next up is the eggs. I use these straight from the fridge. How awesome is that. No need for aging the egg whites for days on end on the counter. This is the best part of this recipe.
Place your egg white in your mixer bowl and weigh out your granulated sugar and dump it into the egg whites. Again, no need to wait for them to start to become foamy. I’ve been making Swiss Meringue for over a decade and this is how I make the meringue for that and it was lovely to see Bravetart say just throw the sugar in there. One less step to worry about. Also add in a pinch of salt.


Now start mixing this at speed 4 for 3 minutes. It won’t look like much after 3 minutes.

Then turn the speed up to 6 and keep going for another 3 minutes.

Then turn the speed up to 8 and go for another 3 minutes. I know this goes against every thing you’ve heard or read, but I swear this works.

Almost there. Now is the time you add in your vanilla bean paste (or extract if that is what you have) and any paste colouring you want to use. I don’t use colouring in my macarons, as every time I’ve tried they don’t work for me. I tend to leave them natural and colour the fillings instead. Once you’ve added in your extract, turn the mixer back on to 10 for one more minute.

All done. Now it’s time to mix in the almond/powdered sugar/cocoa mixture. Just dump it in all at once. No need for mixing it in, in 3 different batches.

The folding technique I use can be found here (www.eatlivetravelwrite.com). She has a couple of videos showing the folding technique of going around the bowl and then pushing down in the middle. You’re trying to deflate the meringue. Remember to keep count of how many times you fold. It should take between 40 to 50 turns, depending on how firm you are with your folding.
This is after 25 turns. Not there yet.

This is after 50 turns. I probably could have gone 1 or 2 more times.

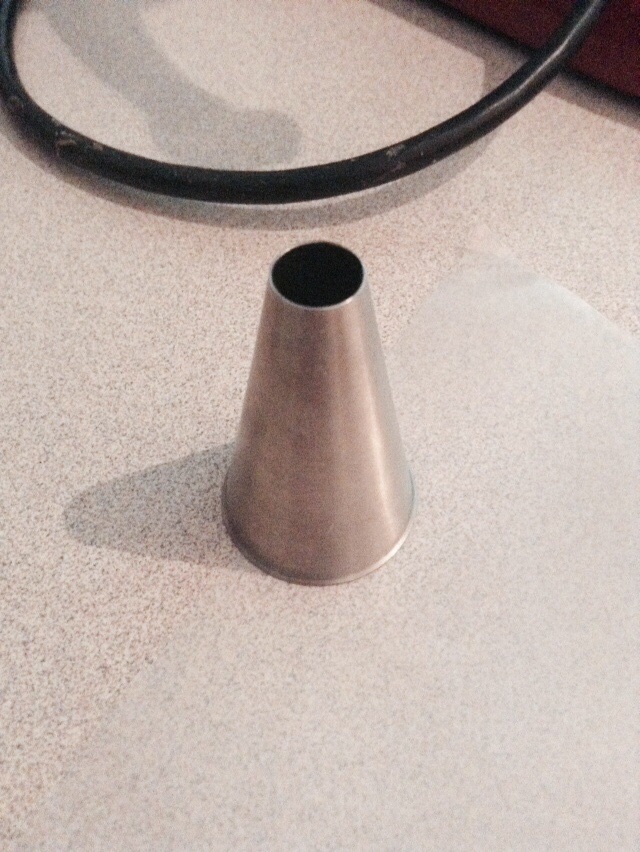
Have our piping bag ready. You can get this ready while the meringue is whipping up. Using a plain round tip. I place my piping bag in a cup and fold the bag over the top to help me be able to use both hands when filling the bag. Twist the tip and push the bag in slightly so when you pick the bag up the batter doesn’t start coming out right away.

The blog at http://www.eatlivetravelwrite.com also has a video showing the piping technique that I use. But I would say use whichever is easiest for you. I would suggest making yourself a template. It’s really easy. I just used a piece of parchment that fits my baking sheets and then traced out 1 inch circles on it in black marker. I also marked the center of each circle. This way you can place this underneath your parchment paper and pipe out your macarons and them move the stencil over to the next baking sheet. Once you have the macarons piped out, bang the baking sheet on the counter 4 times, giving the pan a 1/4 turn, bang 4 more times, give a 1/4 turn, bang 4 more times, give a 1/4 turn and bang 4 more times. This will dislodge any air bubbles.


I like to let my macarons sit and dry/crust over for about an hour (sometimes it takes longer depending on the weather). The original recipe said just put them in the oven right away, but I found this didn’t work for me, I need to let them crust over. You can tell they have crusted over when you can run your finger along the top and the batter doesn’t stick to your finger.

This is when I start to preheat my oven. Preheat your oven to 290°F. Also position your oven rack to the lower third of your oven (for me that’s right below the fan at the back of the oven, although I do not use the fan when baking these). Once the oven is preheated, I bake these 1 pan at a time, and bake for 18 to 20 minutes. No need to rotate the pan or leave the oven door ajar with a wooden spoon.
Remove from the oven and all to cool completely on the baking sheet. Don’t try and remove them before they are complete cool (I’ve tried this and it was a disaster).


As you can see, I do get some sticking, but I don’t want to over cook them and completely dry them out. Then make whichever filling you would like (I used chocolate ganache and a seedless raspberry jam).


Allow these to so sit in the fridge for at least 24 hours for the flavors to meld.
This recipe makes 4 dozen macarons (that’s 8 dozen shells – they are 1″ cookies so if you make them larger, then you will get less cookies). I consistently get 4 dozen macarons, whether I’m using ground almonds or ground pecans (which are amazing).
There are still times when I get one or two that crack on the top, but it’s okay, they still taste good.

Hopefully you will try these and enjoy, no matter if they turn out with feet or not. Although I have to say the first time my macarons came out of the oven with feet I was so excited I texted my husband and he was quite confused and thought I had gone insane. Then he came home and figured out what I was talking about.
Macarons
(makes 4 dozen 1 inch macarons)
100 gr. ground almonds
200 gr. powdered sugar
30 gr. cocoa powder
4 egg whites
72 gr. sugar
pinch of salt
1 tsp. vanilla bean paste
**Prepare your baking sheets – line with parchment paper and place your template underneath the parchment paper. I use 4 baking sheets, as the template I have made for myself is 2 dozen macaron shells and this recipe makes 8 dozen macaron shells so I use 4 baking sheets).
**Prepare your piping bag.
- Weigh out your almonds, powdered sugar and cocoa powder. Sift together. Make sure everything is combined evenly. I usually whisk together the sifted ingredients together to make sure they are combined evenly.
- In the bowl of your stand mixer, place your 4 egg whites, 72 grams of sugar and a pinch of salt. Place on your stand mixer and turn the mixer on to speed 4 (Kitchenaid) for 3 minutes.
- After 3 minutes turn the speed up to 6 (Kitchenaid) and let this go for 3 minutes.
- After 3 minutes turn the speed up to 8 (Kitchenaid) and let this go for 3 minutes.
- At this point turn off the mixer and add in the vanilla bean paste.
- turn mixer back on to the top speed (10 on a Kitchenaid) and let this go for 1 minute.
- Using a flexible rubber spatula scrap the meringue from all the sides of the bowl and dump the almond/powdered sugar/cocoa powder mixture into the meringue.
- Using a folding motion as well as a squishing/slapping motion, combine the ingredients together. Once you have run the spatula under the meringue push down from the top to deflate the meringue. At first you will have to be a bit more gentle or the powdered sugar mixture will go everywhere, but once it starts to get combined you can be a bit more aggressive with the squishing/slapping motion. Remember we’re trying to deflate the meringue.
- This should take between 40 to 50 turns. To check, place a spoon full on a place and tap the plate on the counter about 10 times, if it levels out to a flat disc you are there, if not, give it a couple more turns and try again.
- Fill your piping bag with 1/2 the batter (don’t try and do all the batter at once).
- Start piping your macarons (I place my piping tip at a 45° angle to the pan and slightly above the paper and pipe into the circle from one edge to fill. Once filled I stop the pressure and use a flicking motion going across the top of the macaron. You can simply pipe straight up and down, like little kisses, but you could end up with little peaks when you are done.)
- When you have piped your first sheet, remember to remove the template.
- Bang the baking sheet on the counter (this will dislodge any air bubbles). Give the pan 4 bangs and one side, give the pan a 1/4 turn, bang 4 more times, give the pan another 1/4 turn and bang 4 more times, then another 1/4 turn and bang 4 more times.
- If you notice you have some “peaks” using a little bit of powdered sugar on the tip of your finger, gently push these down. (I noticed when I used water for this I ended up getting a lot of cracks, so use powdered sugar).
- Continue piping out your remaining sheets.
- Allow the macarons to rest and crust over in a cool place. This could take anywhere from 30 minutes to an hour.
- Once the macarons have crusted over, pre-heat your oven to 290°F. Position your baking rack to the lower third of your oven.
- Bake the macarons 1 sheet at a time, for 18 to 20 minutes. Remove from oven and allow to cool completely on the pan.
- Once completely cool, gently remove the macarons from the parchment paper. (I carefully peel them off from one end, and then slowly roll the parchment paper back on itself and continue peeling the macarons off.
- Pair the macaron shells up with similar sized macarons (if you didn’t use a template. If you did this shouldn’t be a problem).
- Use your desired filling (ganache, Nutella, buttercream, jam) and fill the macarons. Sandwich them together and store in a container in the fridge for 24 hours to allow the macarons to “ripen”.
I hope you enjoy these and impress your friends.

Greetings 🙂
Glad to hear that you didn’t stop trying! I must say, your tries were worth it, because the end result looks pretty great 🙂 Good job!
LikeLike
Thank you so much.
LikeLike
Congratulations on accomplishing what looks like the perfect macarons!
LikeLike
Thanks. I never realized how good it would feel to make a cookie, but every time they come out of the oven looking perfect I get so excited.
LikeLiked by 1 person
I can only imagine how exciting it must have been when they came out so great because they definitely don’t look easy to make!
LikeLike